Bahut sare beginners wordpress.com
Agar aap ye janna chahte hai ke WordPress.org ke kya benefits hai to aap niche diye gaye link ko follow kare.
Apne Site ko wordpress.com se wordpress.org pe move karne se pahle aapko kuch chizon ka dhyan rakhna hoga.
Hosting ke liye Bluhost duniye ke bare hosting companies me se ek hai, bluehost wordpress ka bhi recommended hosting provider hai. Bluehost se hosting purchase karne ke liye aap niche diye gaye link ko follow kar kar sakte hai.
Agar aapke website pe pahle se koi custom domain name hai phir bhi aapko ek custom domain name ki zaroorat hogi.
Hosting account ke alawa aapko apne wordpress.com site ko access karne ki zaroorat hogi, taki aap apne sabhi images, posts, comments aur dusre data ko self hosted wordpress.org pe easily move kar sake.
To aaeye dekhte hai ke hum wordpress.com ko selef-hosted wordpress.org pe kaise move kare.
How to move from wordpress.com to wordpress.org
Step 1. Apne blog ko wordpress.com
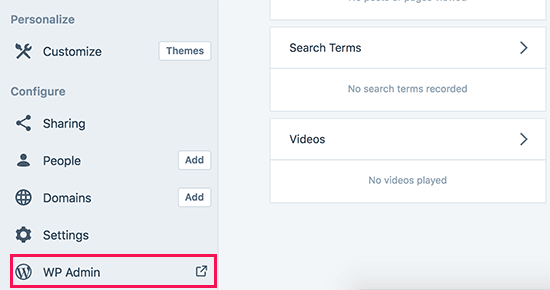
Left corner me WP Admin link pe click kar ke blog ke admin area ko open karna hai.
Uske baad aapko Tools me Export page pe jana hoga.
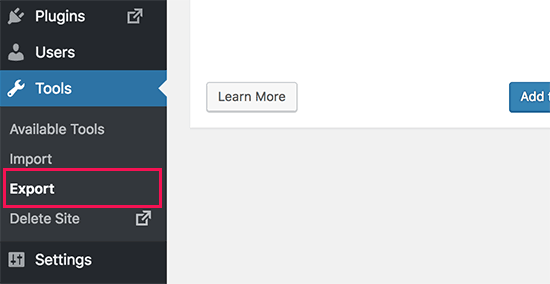
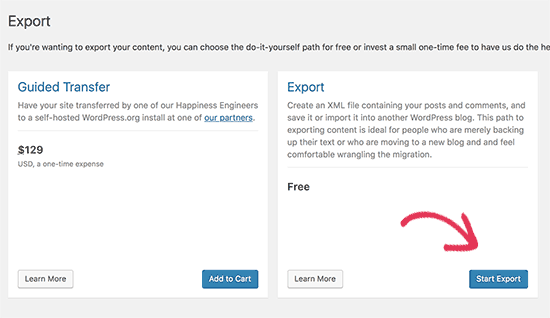
Export tool pe
Agle screen pe aapse pooch ajayega ke aap kin data ko export karna chahte hai. All content ko select kare aur Download Export File button ko press kare.
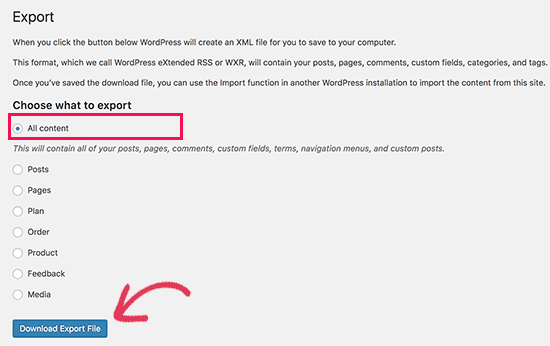
Exporter aapke computer me XML file download kar lega. Is file me aapke sabhi posts, pages, images, comments, custom fields, categories, tags, navigation menu aur desre information honge.
Step 2. WordPress.com ke data ko export kar lene ke baad ab aapko apne web hosting account pe ek fresh wordpress install karna hai.
WordPress ko install karna bahut aasan hai, agar aapne upar diye gaye link ko follow kiya hoga to wordpress automatically install ho jayega.
WirdPress install kar lene ke baad ab aapko apne content ko new self-hosted WordPress website pe import karne ki zaroorat hai.
Apne wordpress.com ke content ko wordpress.org pe import karne ke liye aapko apne fresh installed wordpress ke admin area me login karna hoga.
Uske
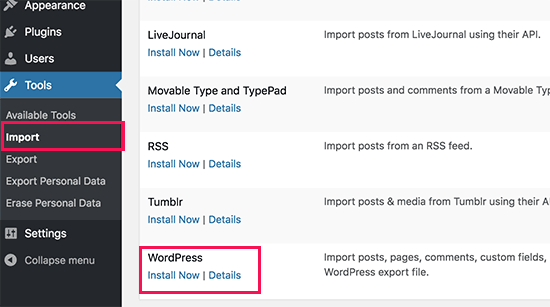
WordPress ab aapke liye wordpress importer ko install kar dega. Ek baar complete ho jane ke baad aapko ‘Run importer’ link pe click karna hoga.
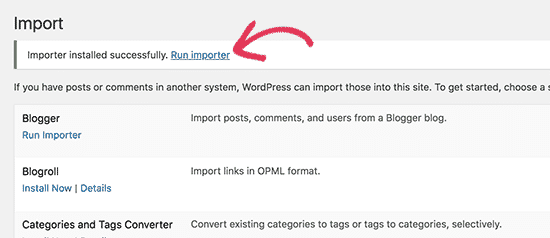
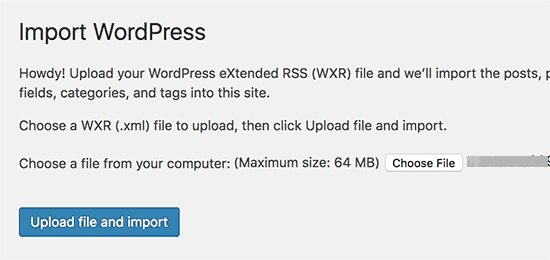
Ye aapko us screen pe le jayega jahan aapse WordPress.com XML file ko upload karne ke liye kaha jayega.
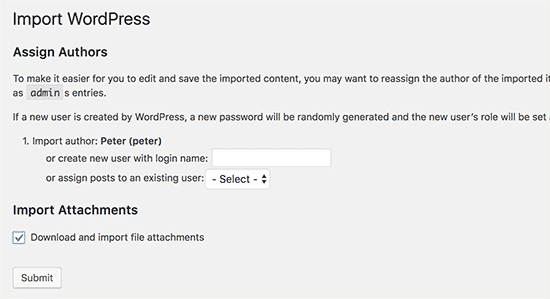
Import karte waqt aapse poocha jayega ke is content ko naye user ko assign karna chahte hai ya existing user ko. Aapke pass poorane attachment ko import karne ka option bhi hoga. Aap import attachment ke box ko check kare taki aapke images aur files properly import ho sake.
Step 4. Agar aap apne blog pe blogroll ya dusre links ke liye link feature ka use karte hai to aapko is instruction ko follow karna chahye, iska use kar ke aap apne links ko import kar sakte hai aur agar aap is feature ka use nahi karta hai to aap step 5 pe jump kar sakte.
Blogroll links ko OPML form me export karte hai. Ye ek XML format hai jise aap apne link ya link category ko import aur export karne ke liye use kar sakte hai. WordPress.com pe OPML file niche diye gaye location pe located hota hai.
http://example.wordpress.com/wp-links-opml.phpExample ko apne WordPress.com blog’s subdomain se replace kar den.
Agar aap apne WordPress.com blog pe custom domain ka use karte hai to aapka OPML file niche diye gaye location pe hoga.
http://www.example.com/wp-links-opml.php
Aapka OPML file
CTRL+S command ko press kare.
Ab aapke paas WordPress.com links ka backup hai. Aapko ab ise wordpress.com me import karna hai.
Ab aapko Link Manager plugin ko install karna hai. Aap is plugin ko install aur activate kare.
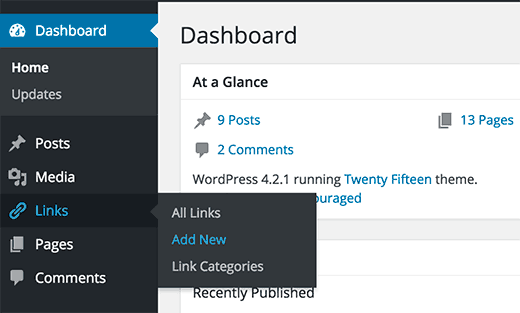
Ab aap apne WordPress site pe blogrolls ko manage kar sakte hai aur unhe safely import kar sakte ahi. Tools » Import me jakar aap blogroll pe click kar ke OPML importer ko install kar sakte hai.
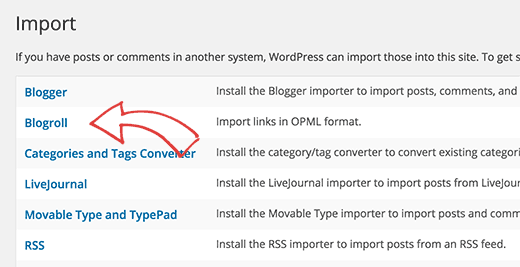
Installation ke baad aapko importer pe redirect kar diya jayega, jahan pe aapko OPML file ko intall karna hoga. OPML file button click kare.
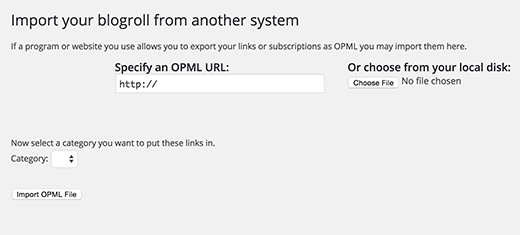
WordPress ab aapke links and link categories ko OPML file se import karega. Complet ehone pe aapko success messag emil jayega.
Step 5. Agar
Aap
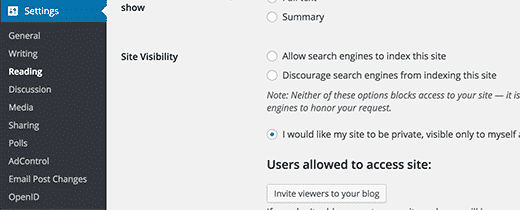
Step 6. Users ko new location pe redirect
WordPress.com blog’s ke dashboard me setting me jaye aur ‘Site Address’ option me ‘redirect’ link pe click kare.

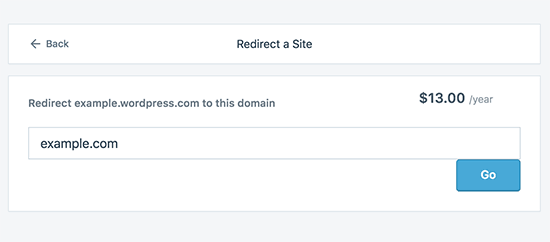
Next screen pe aapse domain name manga jayega jahan pe aapke visitors ko redirect kiya jayega. domain name enter kare aur Go button pe click kare.
Agar aap apna domain change karte hai to aapko sabhi in-post URLs ko update karna hoga.
Agar aapke pass wordpress.com pe ek custom domain tha to aapko pareshan hone ki zaroorat nahi hai. Sirf aap apne DNS record ko host me change kar de aap sabhi SEO benefits ko retain kar lenge.