Kya aap bhi apne WordPress site ko kisi dusre language me automatically translate karna chahte hai. Apne WordPress site ko dusre language me translate karne ke kuch different ways hai. Aap khud se translate kar sakte hai, translators hire kar sakte hai, ya AI powered translation tools ka use kar sakte hai. Is articleme hum aapko batayenge ke aap machine learning ki help se WordPress site ko automatically translate kaise kare.

WordPress Site Ko Automatically Translate Kyu Kare
WordPress site ko automatically translate karna aapke content ko aapke user ke language me provide karna aasan banata hai.
Wahi agar aap apne site ko manually translate karenge to isme aapko bahut zyada time lagega. Aapko multilingual WordPress website banane ke liye translator ko hire karna hoga aur aap jitne language ko add karenge aapko utna zyada translator ko hire karna hoga jo aapke cost ko increase kar dega.
Agar aap apni site ko automatically translate karte hai to ye quick hone ke sath hi affordable bhi hai. Aap ya to kuch important pages ko translate kar sakte hai ya phir aap apne poori site ko translate kar sakte hai.
Translation quality manual translations ke jitna accha nahi ho sakta. Lekin, AI-powered tools aapke liye ek behtar quicker and cost-effective alternative ho sakta hai.
To chalye dekhte hai ke WordPress site automatic translation kaise set kare.
WPML Plugin Set Up
WordPress ko automatically translate karne ka easiest way translation plugin ko use karna hai. WPML iske liye ek accha option hai.
WPML ek premium plugin hai aur automatic translations ko run karne ke liye aapko ‘Multilingual CMS’ plan ki zaroorat hogi.
Sab se pahle aapko WPML plugin ko install aur activate karne ki zaroorat hogi. Zyada detail ke liye aap haamre WordPress Plugin Install kaise kare guide ko follow kar sakte hai.
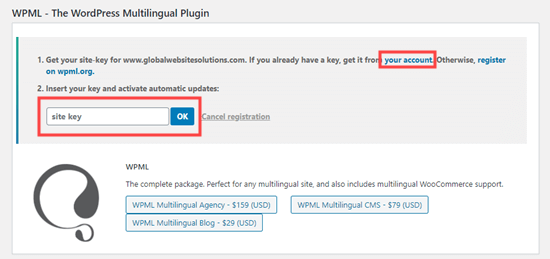
Activate hone pe plugins page pe ‘Register Now’ link pe click kare. Phir aapko ek page dikhega jaha pe aapko apne site key ko enter karna hoga. Ise aap apne WPML website pe acne account me dekh sakte hai.
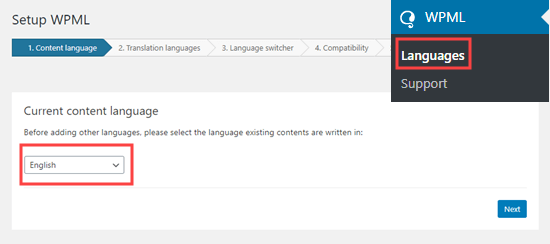
Ab aap apne WordPress admin me WPML » Languages page pe jaye . Yaha pe aapko WPML setup options dikhega.
Pahle aap apne current content ke liye language ko select kare phir Next button pe click kare.
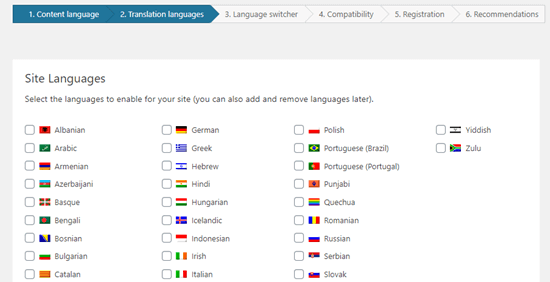
Ab aapko un languages ko choose karna hai jise aap apni site ke liye enable karna chahte hai. Aapko select karne ke liye languages ke samne ke box ko check karna hai.
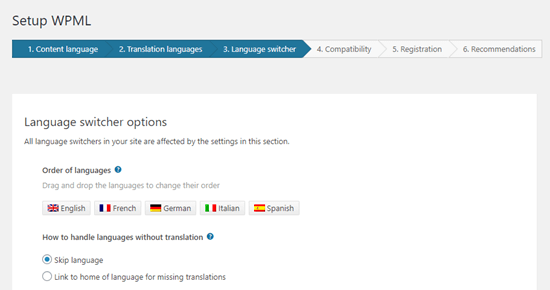
Aapke site pe language options language switcher me dikhega.
WPML switcher me languages ke order ko choose karne ke liye prompt generate karega. Aap yaha pe kisi page ke translation na hone pe kya karna hai ye bhi choose karna hoga.
Iske niche aap apne navigation menu me language switcher ko add kar sakte hai. Iske alawa aapise apne site ke widget ya footer area me add kar sakte hai.
Finally aapke pass translation ko apne post ke upar ya niche add karne ka option hoga. Agar aap is option ko enable karenge to aap choose kar sakte hai ke ye translation links kaisa dikhega. Aap preview bhi dekh sakte hai.
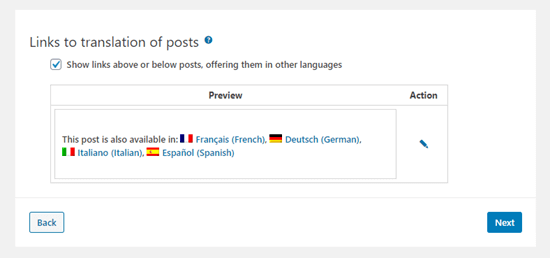
Next button pe clivk kar ke aap aage move kar sakte hai.
WPML aapse poochega ke kya aap themes aur plugin information ko WPML.org ko send karna chahte hai. Ye aapke liye support ko fast karne me help karega.
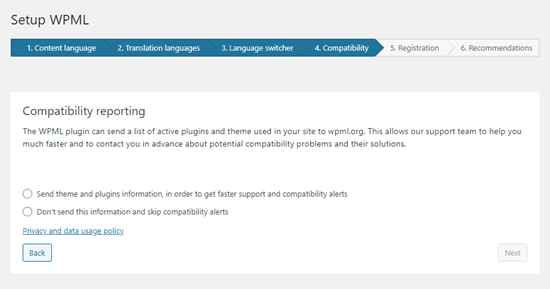
Agar aapne abtak site key enter nahi kiya hai to aapko yaha pe enter karna hoga. Agar aapne already enter kar diya hai to aap simply Next button pe click kare.
Uske baad aapko kuch dusre components ko install karne ke liye recommendations dikhega. Yaha pe aapko String Translation aur Translation Management addons ko add karna hoga.
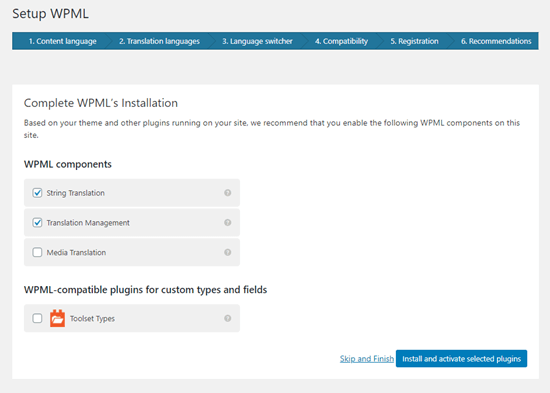
Finally, setup wizard ko close karne ke liye ‘Skip and Finish’ link pe click kare.
Content Ko Automatically Translate Kare
Apne content ko translate karne ke liye aapko WordPress admin me WPML » Translation Management page pe jana hoga.
Yaha pe aapko ye choose karna hai ke aapke site ko kaun translate kar sakta hai. Aap ‘Only myself’ ko choose kare.
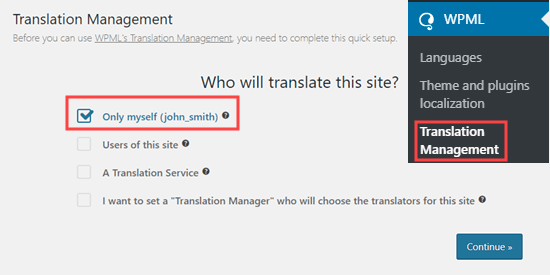
Uske baad aapko Advanced Translation Editor ke bare me kuch detail dikhega. Simply aap continue pe click kare. Phir aapko summary dikhega jaha pe aap ‘Done!’ button pe click karna hoga.
Uske baad aapko translation management dashboard pe le jaya jayega.
Yaha pe aapko ‘Translation Tools’ tab pe click karna hoga uske baad automatic translations set up karne ke liye ‘Sign up for free’ button pe.
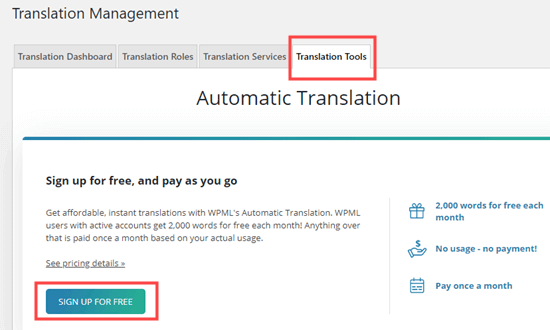
Tip: Aapko 2,000 words/month ka machine translation free me milega.
Phir aapko apna billing details dalne ke liye kaha jayega.
Uske baad aap ‘Translation Dashboard’ tab pe click kare. Yahe se aap us content ko select kar sakte hai jise aap translate karna chhate hai.
Simply aap apne choose kiye jane wale page ke samne boxes ko check kare.
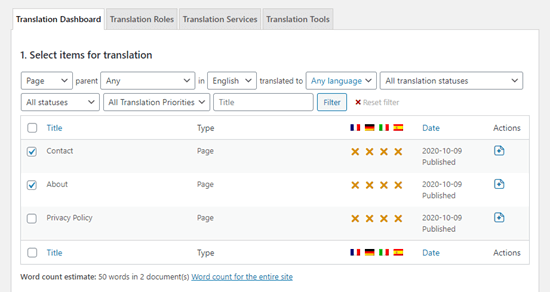
Aapke content ko select kar lene ke baad aapko word count estimate dikhega. Ye aapke automatic translations ke budgetme help karega.
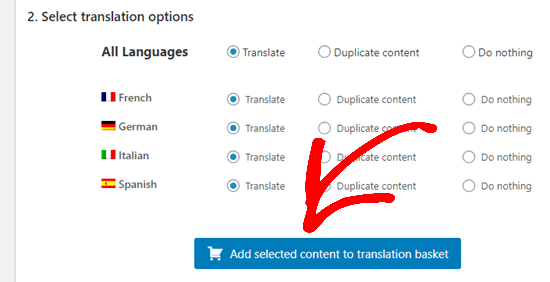
Age aap niche scroll kar ke Select translation options’ pe aaye. Ye by default aapke chosen content ka translation sabhi languages me kar dega, lekin agar aap chahe to setting ko change kar sakte hai.
Apna selection karne ke baad aap ‘Add selected content to translation basket’ button pe click kare.
Phir aapko ek success message dikhega.
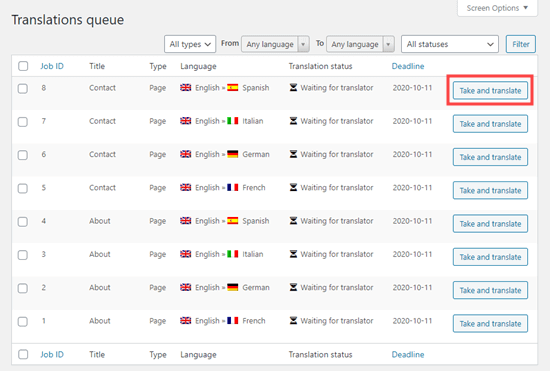
Uske baad aap apne WordPress admin me WPML » Translations page pe ja kar translations queue ko dekh sakte hai.
Automatic translater ko use karne ke liye ‘Take and translate’ button pe click kare.
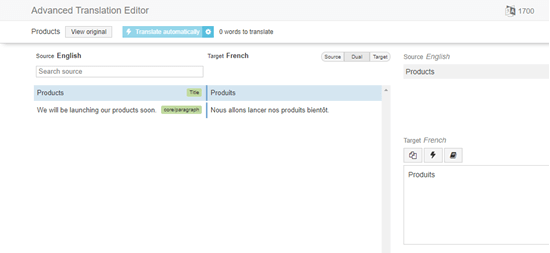
Uske bad aap aapko dvanced translation editor dikhega. Yaha pe aapko ‘Yes, translate automatically’ button pe click karna hoga.
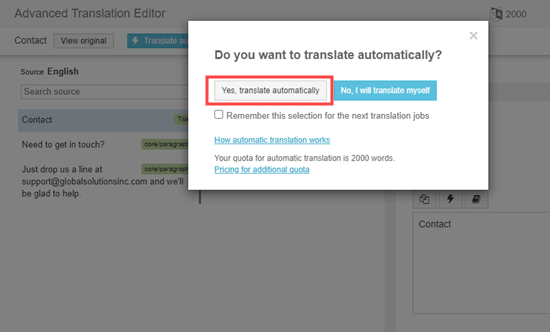
WPML ab aapke content ko chosen language me machine learning ki help se automatically translate kar dega.
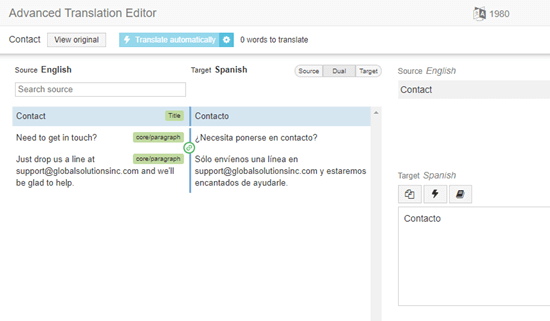
Simply aap screen ke bottom me ‘Complete’ button pe click kare aur aapp isi tarah se aap apne dusre page ko translate kar sakte hai.
Aap apni website pe kisi page pe jakar apne translated versions dekih sakte hai.
Automatically WordPress Content Ko Bulk Me Translate Kare
Agar aapke pass translate karne ke liye bahut sare content hai to aap unhe batch ki tarah turant kar sakte hai. Pahle ki tarah hi aapko apne content ko Translation Basket me add karna hoga aur use translation ke liye send karna hoga.
Uske baad Translation Tools tab me jaye. Yaha pe aapko translation jobs ki ek list milegi. List ke top me aa rahe checkbox pe click kare taki ek sath sab select ho jaye.
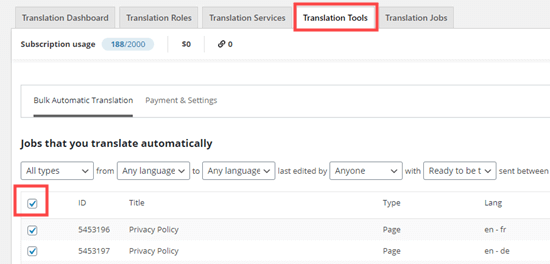
Ek page pe sirf 10 items fit ho sakte hai. Agar aapko dusre pages ko selct karna hai to aap ‘2’ button ko bottom right corner me click kar sakte hai.
Sabhi jobs ko select kar lene ke baad ‘Translate automatically’ button pe click kare.
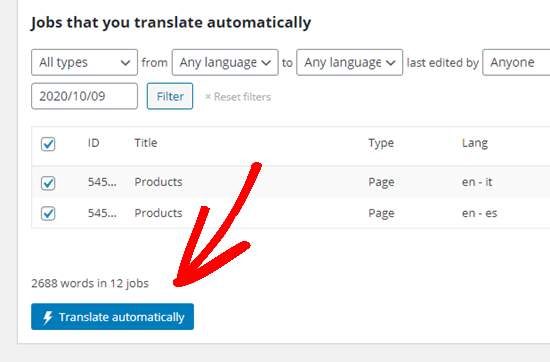
Ye aapke liye automatically translate ho jayega. Aap completed versions ko pahle ki tarah apni site pe jakar dekh sakte hai.
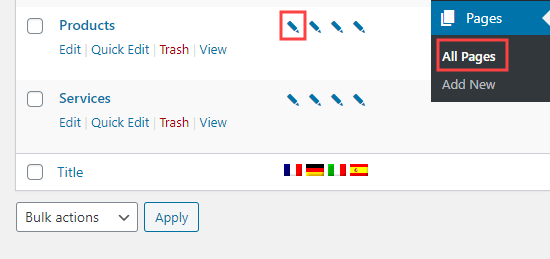
Agar aap completed versions ko edit karna chahte hai to simply apne WordPress dashboard me Pages » All Pages me jaye. Phir language ke pencil icon pe click kare.
Phir ye Advanced Translation Editor ko launch karega.
WordPress Admin Ke Language Ko Change kare
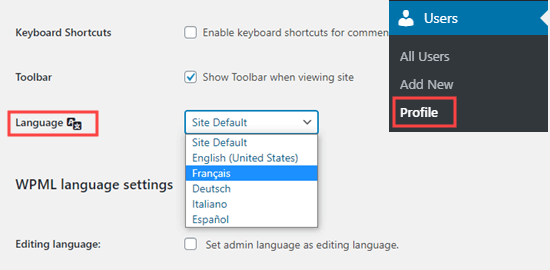
WPML WordPress admin area me different users ko different languages select karna allow karta hai.
Aap ise easily Users » Profile me jakar Language dropdown se preferred language choose kar sakte hai.
Page ke bottom me ‘Save Changes’ button pe click kar ke changes ko save kare.
Ab aapka admin area chosen language me translate ho jayega.
Ummid hai aapko WordPress site ko automatically translate karne ka ye article (WordPress site ko automatically translate kaise kare) informative laga hoga. Agar aapka koi swaal hai to aap humse comment section me pooch sakte hain. Apke liye ye (WordPress in Hindi) course design kiya gya hai, Is Website pe apko WordPress Complete Course Hindi me mil jyega, Agr aap WordPress se related videos dekhna chahte hain to aap hmare WP Seekho YouTube Channel par bhi visit kar sakte hain.